
Adding a Director
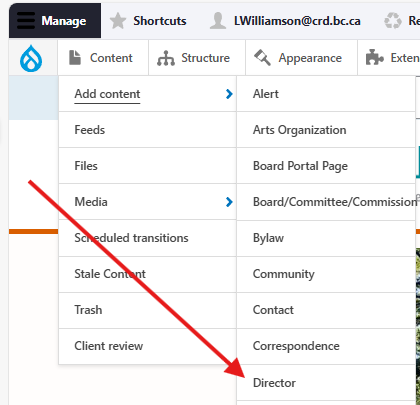
Once logged in, go to the the Drupal Admin toolbar and navigate to Content > Add content > Director.
Image
Input the following fields:
- Director full name
- Last Name
- Director profile
- Link to Director Profile
Clicking the Director information tab will display the following additional fields:
- Role/title: For the director's role/title on the CRD Board of Directors.
- Image: For uploading a headshot of the director. Image size is 2:3 (360x540px).
- Alternate(s): For listing the names of an individual director's alternate(s). This is a short text field so inputs should be concise.
- Community: For specifying which community the director represents.
- This input will display the director's information on the corresponding Community content type. See the Community content type page for additional information.
- Position: For specifying the director's position in their respective community, e.g., mayor of Saanich.
- Address
- Phone
Once you have filled out the above fields, make sure that the drop down next to Published is selected, and click Save.
Editing a Director
- To edit a specific node, click on Content in the Drupal toolbar.
- Filter by the Director content type.
- Click to edit the specific node. Make your desired edits.
- Make sure that Published is selected in the dropdown menu, and click Save.
Content lifecycle
There are no scheduled transitions in place for this content type. Content should be reviewed at least once per year to ensure its accuracy.
Editorial guidelines
For instructions on when to use the Director content type and how to write this type of content, see the UX style guide.